> ## Documentation Index
> Fetch the complete documentation index at: https://docs.peektag.com/llms.txt
> Use this file to discover all available pages before exploring further.
# Search Target Tag
> Find relevant tags, open a pin request, and send a new request to another tag owner.
 Use this step when a designer wants to find another tag and ask to pin their own tag inside it.
In simple terms, this is the discovery step. The designer searches for relevant target tags, checks whether they look like a good match, and then opens the request flow.
## Find a relevant target tag
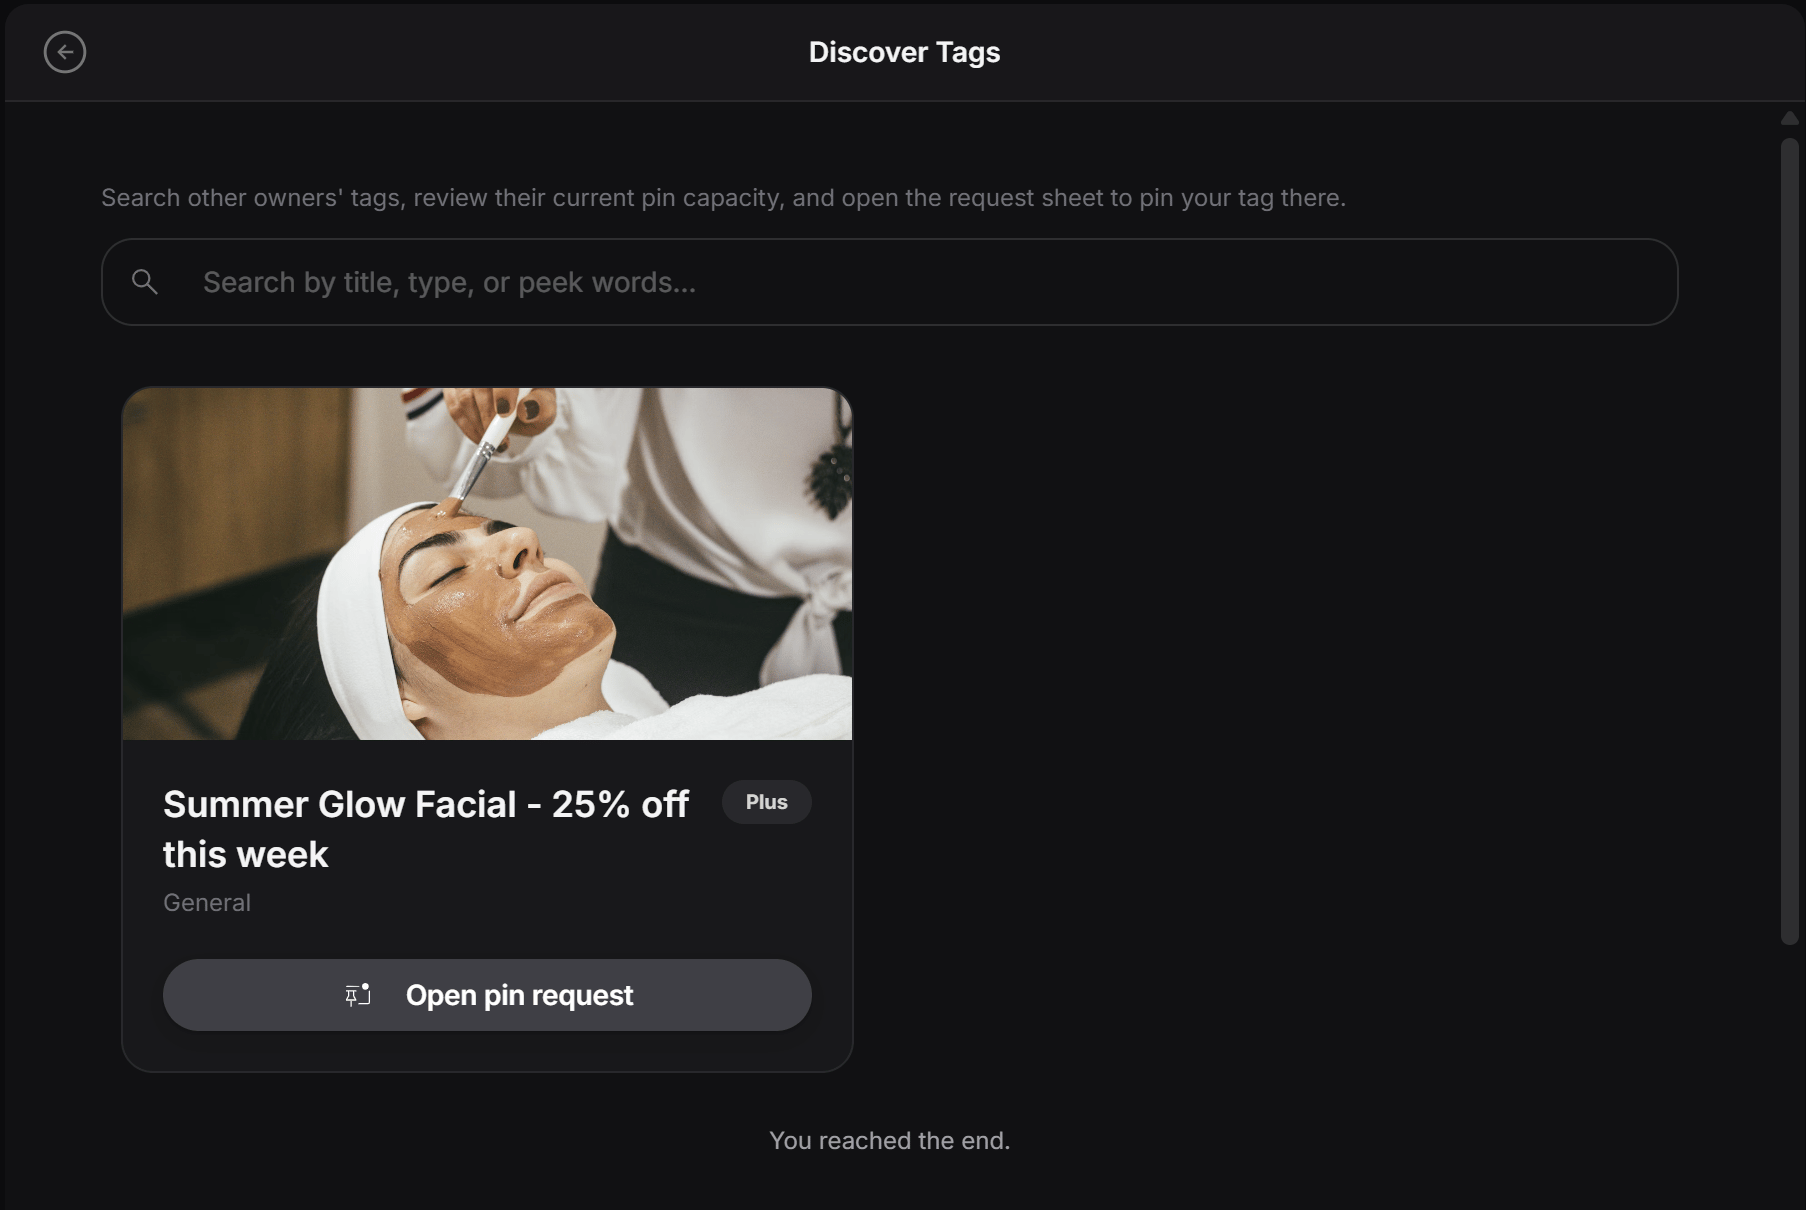
The designer can search across other owners' tags to find the right destination.
Use this step when a designer wants to find another tag and ask to pin their own tag inside it.
In simple terms, this is the discovery step. The designer searches for relevant target tags, checks whether they look like a good match, and then opens the request flow.
## Find a relevant target tag
The designer can search across other owners' tags to find the right destination.
 This is useful when they want to:
* connect their experience to a partner tag
* place a product or offer inside another tag
* request visibility in a related experience
* reach a new audience through another owner's tag
The search helps the designer review candidates before sending anything.
## Open the request sheet
After finding the right result, the designer clicks **Open pin request.**
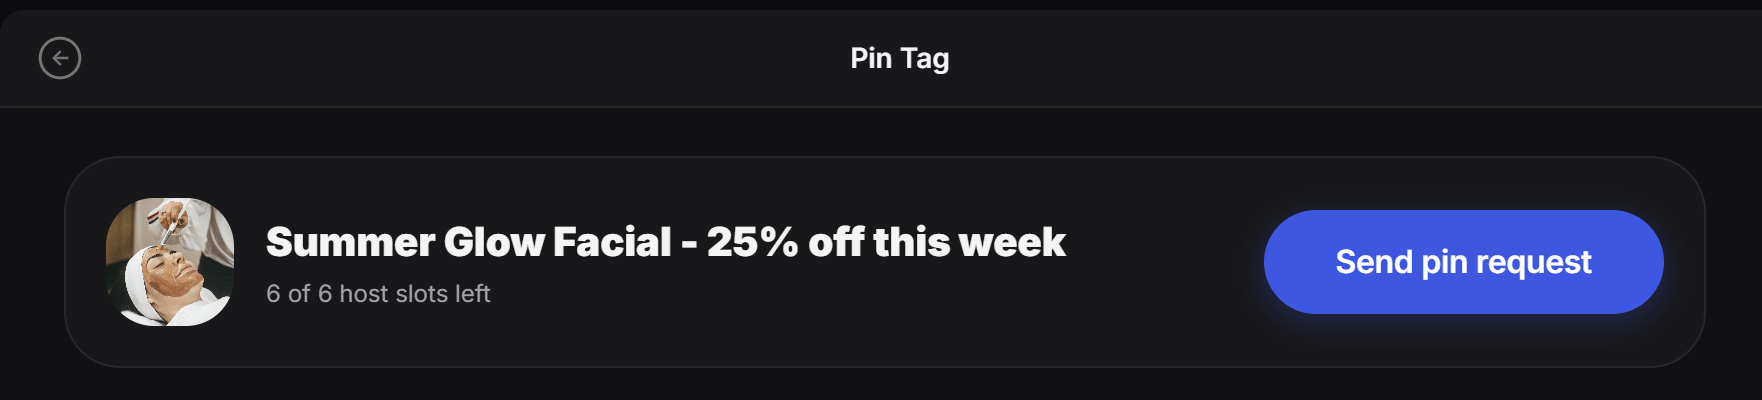
This opens the **Pin Tag** screen, where the full request can be prepared and sent.
This is useful when they want to:
* connect their experience to a partner tag
* place a product or offer inside another tag
* request visibility in a related experience
* reach a new audience through another owner's tag
The search helps the designer review candidates before sending anything.
## Open the request sheet
After finding the right result, the designer clicks **Open pin request.**
This opens the **Pin Tag** screen, where the full request can be prepared and sent.
 This keeps the flow simple:
1. Search
2. Find the right tag
3. Open the pin request
4. Review the request
5. Send it
## Check host capacity
Inside the **Pin Tag** screen, the designer can see how many host slots are still available.
For example, a message like **6 of 6 host slots left** means the target tag still has room to accept pinned tags.
This helps the designer understand whether the target tag still has capacity before sending the request.
## Choose your tag and send the request
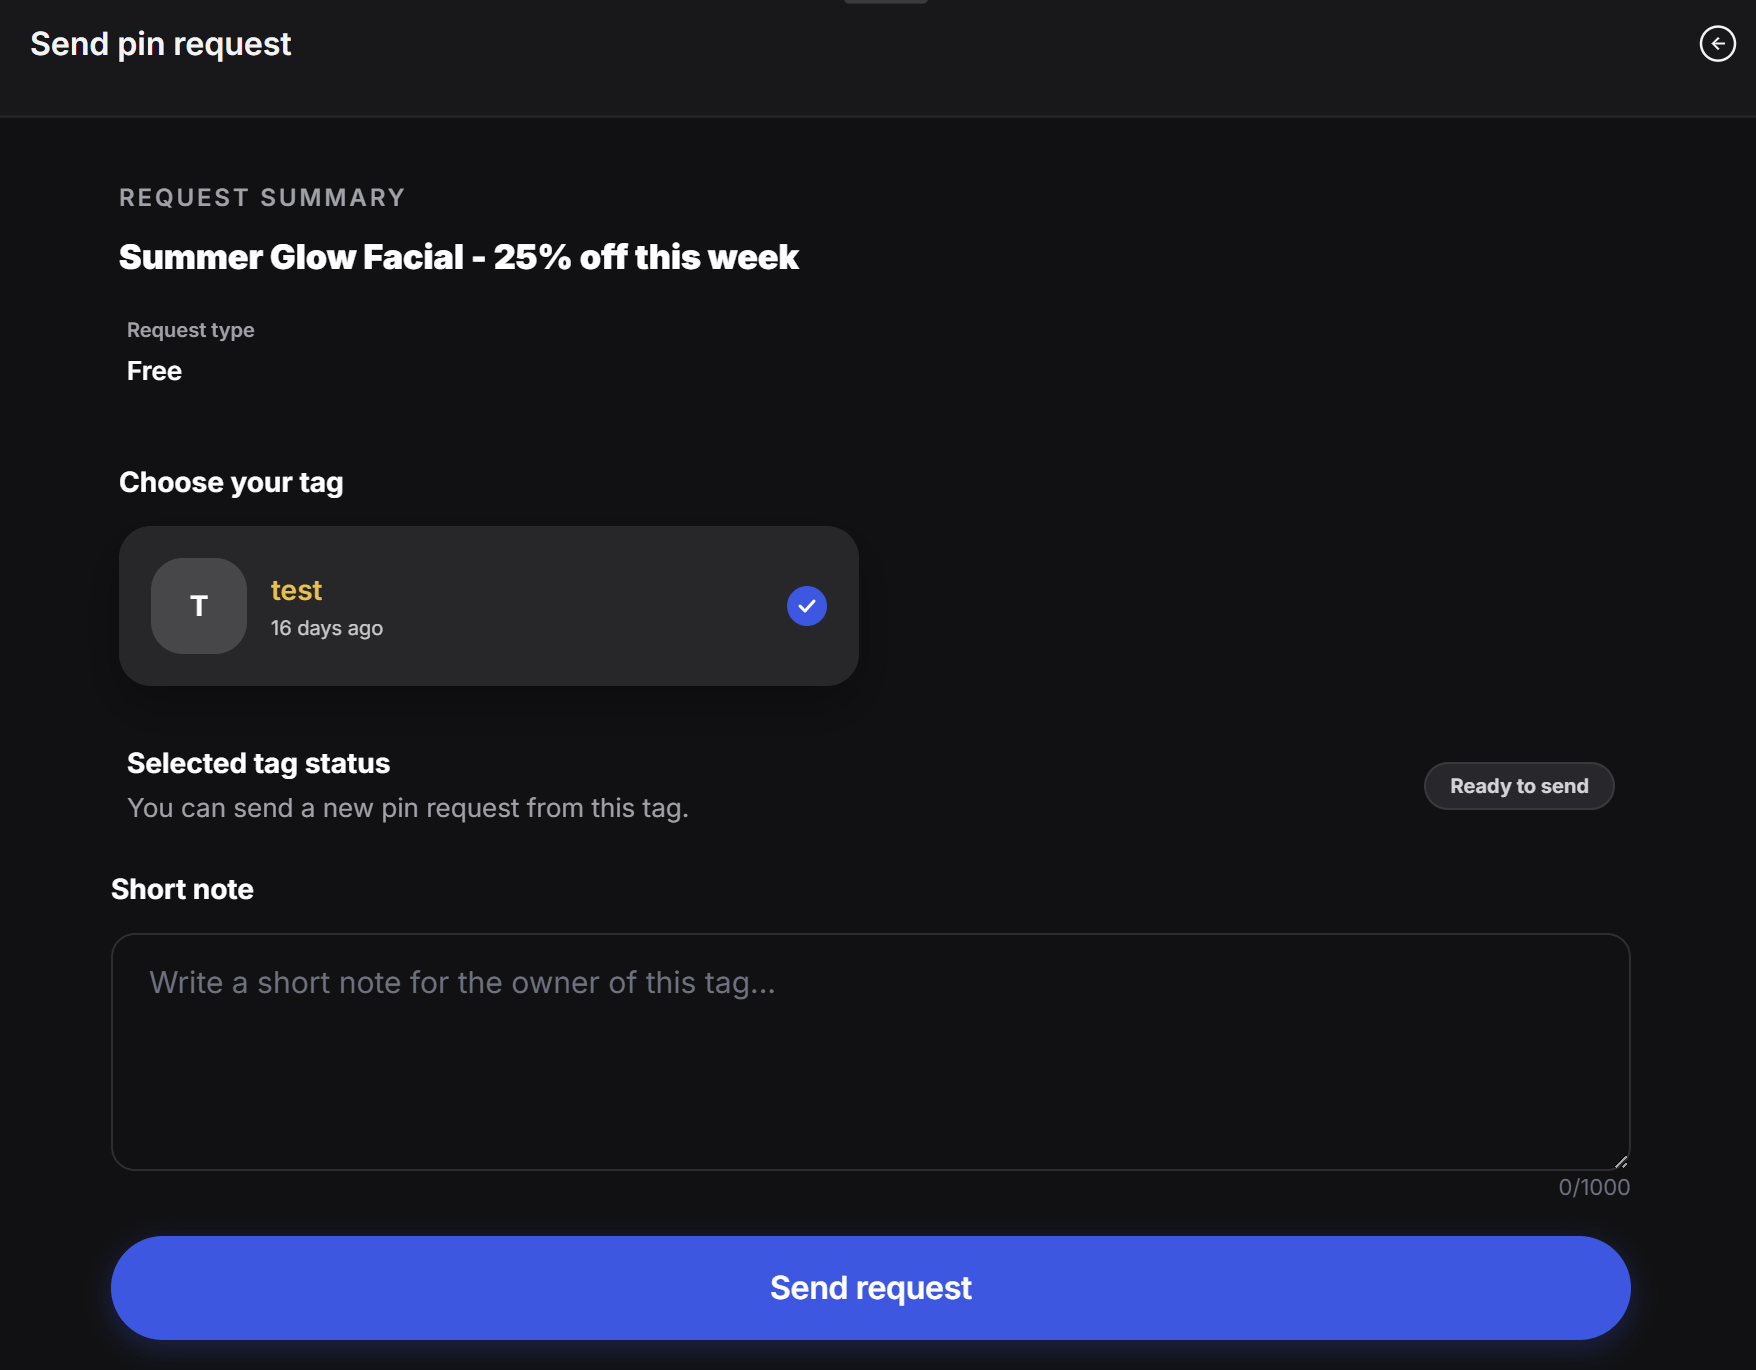
Before sending, the designer selects which of their own tags should be pinned.
They can also write a short request note to explain why the pin makes sense. This is helpful when the owner of the target tag needs context before approving it.
This keeps the flow simple:
1. Search
2. Find the right tag
3. Open the pin request
4. Review the request
5. Send it
## Check host capacity
Inside the **Pin Tag** screen, the designer can see how many host slots are still available.
For example, a message like **6 of 6 host slots left** means the target tag still has room to accept pinned tags.
This helps the designer understand whether the target tag still has capacity before sending the request.
## Choose your tag and send the request
Before sending, the designer selects which of their own tags should be pinned.
They can also write a short request note to explain why the pin makes sense. This is helpful when the owner of the target tag needs context before approving it.
 Good examples for the note:
* why this tag is relevant
* what kind of audience fit it has
* what value it adds to the target tag
* whether it is a campaign, product, or long-term placement
When everything looks right, the designer clicks **Send request**.
## What this step is for
This section is mainly for outbound discovery and outreach.
The designer is not managing approvals here. They are simply:
* finding a target tag
* opening the request flow
* checking available slots
* selecting their own source tag
* sending the request with a short message
Good examples for the note:
* why this tag is relevant
* what kind of audience fit it has
* what value it adds to the target tag
* whether it is a campaign, product, or long-term placement
When everything looks right, the designer clicks **Send request**.
## What this step is for
This section is mainly for outbound discovery and outreach.
The designer is not managing approvals here. They are simply:
* finding a target tag
* opening the request flow
* checking available slots
* selecting their own source tag
* sending the request with a short message