> ## Documentation Index
> Fetch the complete documentation index at: https://docs.peektag.com/llms.txt
> Use this file to discover all available pages before exploring further.
# Stripe
> Connect Stripe so a PeekTag account can accept payments and manage payouts.
 Stripe lets a PeekTag account accept online payments and receive payouts through a connected Stripe account.
Use this connector when a tag or experience needs paid checkout, card payments, or payment-related features. Once Stripe is connected, PeekTag can use that account for payment flows that are owned by the connected user or business.
Stripe payments setup is currently shown as **early access** in PeekTag. Some payment features may still depend on the account, country, business type, and enabled Stripe capabilities.
## What Stripe is used for
Stripe is used when the business wants to collect money through a PeekTag experience.
Common examples include:
* paid orders
* paid bookings
* product checkout
* service deposits
* paid reservations
* premium offers or campaigns
In simple terms: if the customer needs to pay by card inside the experience, the owner usually needs a connected Stripe account.
## Connect your Stripe account
Stripe lets a PeekTag account accept online payments and receive payouts through a connected Stripe account.
Use this connector when a tag or experience needs paid checkout, card payments, or payment-related features. Once Stripe is connected, PeekTag can use that account for payment flows that are owned by the connected user or business.
Stripe payments setup is currently shown as **early access** in PeekTag. Some payment features may still depend on the account, country, business type, and enabled Stripe capabilities.
## What Stripe is used for
Stripe is used when the business wants to collect money through a PeekTag experience.
Common examples include:
* paid orders
* paid bookings
* product checkout
* service deposits
* paid reservations
* premium offers or campaigns
In simple terms: if the customer needs to pay by card inside the experience, the owner usually needs a connected Stripe account.
## Connect your Stripe account
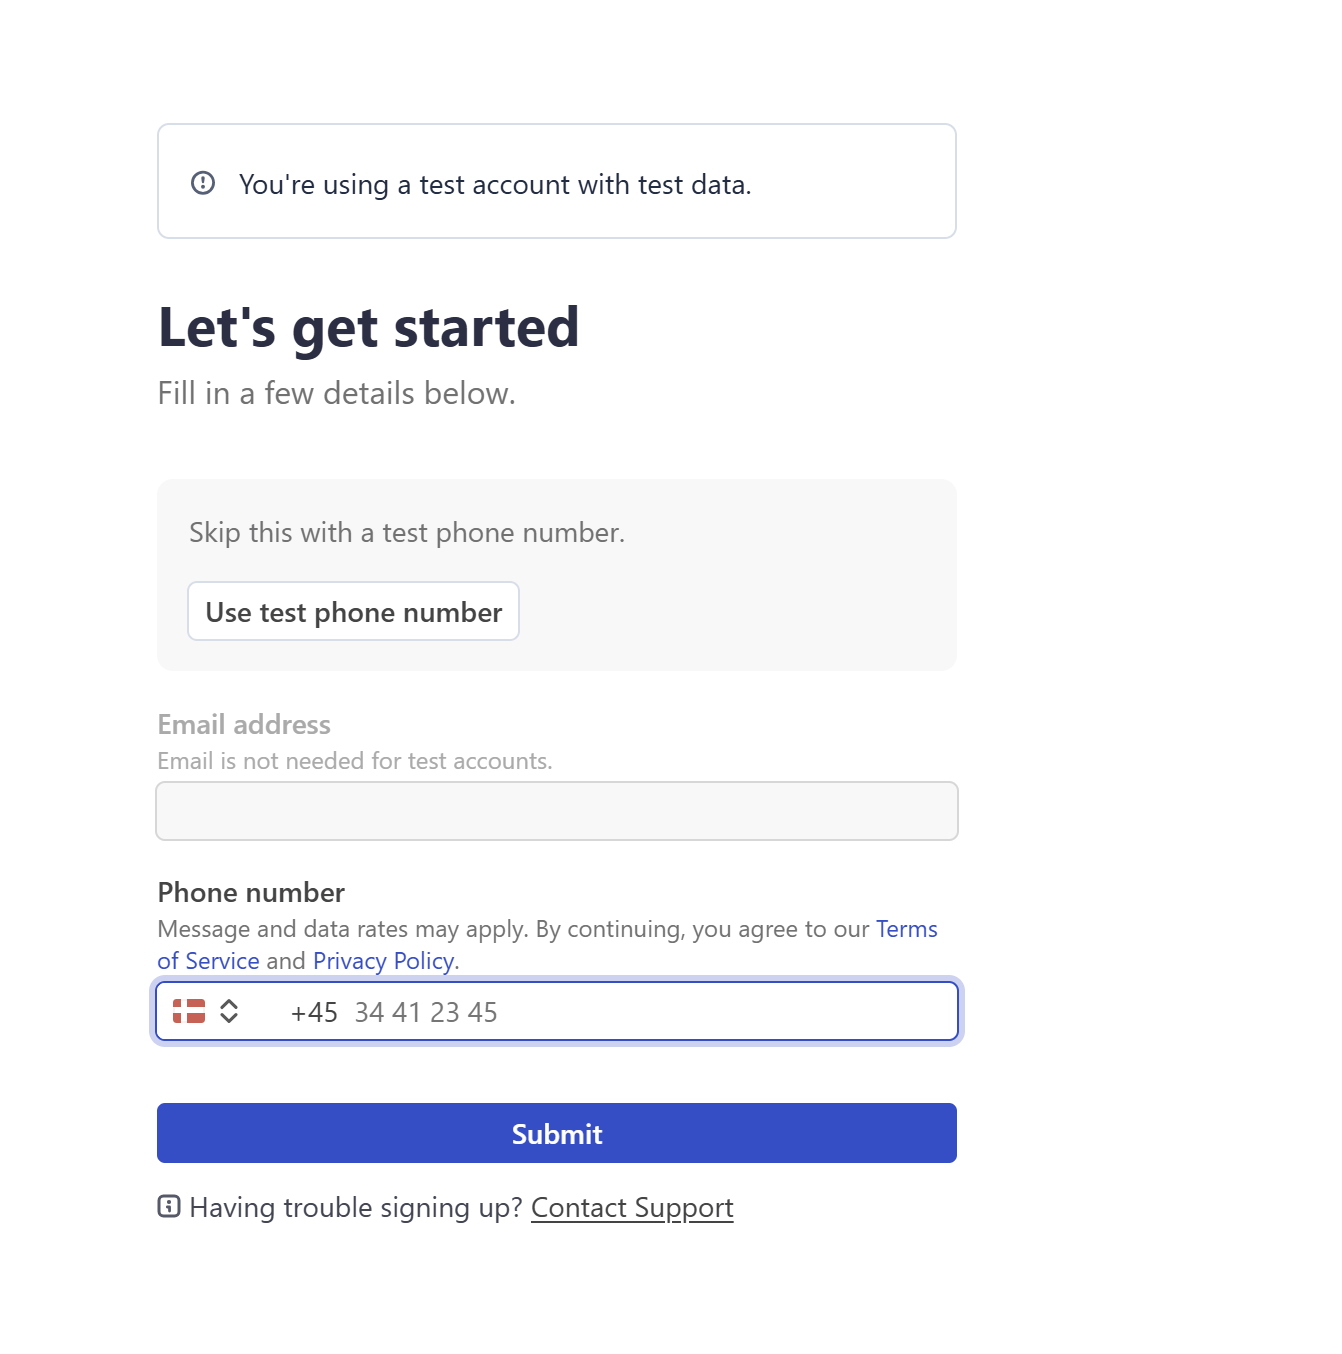 To start, open the Stripe connector and follow the onboarding flow.
Stripe will ask for the information it needs to create or connect the payment account. This can include details such as phone number, email, business information, bank payout details, and identity verification.
During onboarding, Stripe may show a test account screen if the system is running in test mode. In production, the business should complete the real Stripe onboarding with real business and payout information.
## After the account is connected
After Stripe is connected, PeekTag shows the connected account status.
The Stripe status page can show information such as:
* **Account ID**: the Stripe connected account ID
* **Charges enabled**: whether the account can accept payments
* **Payouts enabled**: whether Stripe can send money to the account owner
* **Card Payments**: whether card payment capability is active
* **Transfers**: whether money can be transferred to the connected account
If everything is ready, the account appears as **Connected** and **Active**.
## What the status means
To start, open the Stripe connector and follow the onboarding flow.
Stripe will ask for the information it needs to create or connect the payment account. This can include details such as phone number, email, business information, bank payout details, and identity verification.
During onboarding, Stripe may show a test account screen if the system is running in test mode. In production, the business should complete the real Stripe onboarding with real business and payout information.
## After the account is connected
After Stripe is connected, PeekTag shows the connected account status.
The Stripe status page can show information such as:
* **Account ID**: the Stripe connected account ID
* **Charges enabled**: whether the account can accept payments
* **Payouts enabled**: whether Stripe can send money to the account owner
* **Card Payments**: whether card payment capability is active
* **Transfers**: whether money can be transferred to the connected account
If everything is ready, the account appears as **Connected** and **Active**.
## What the status means
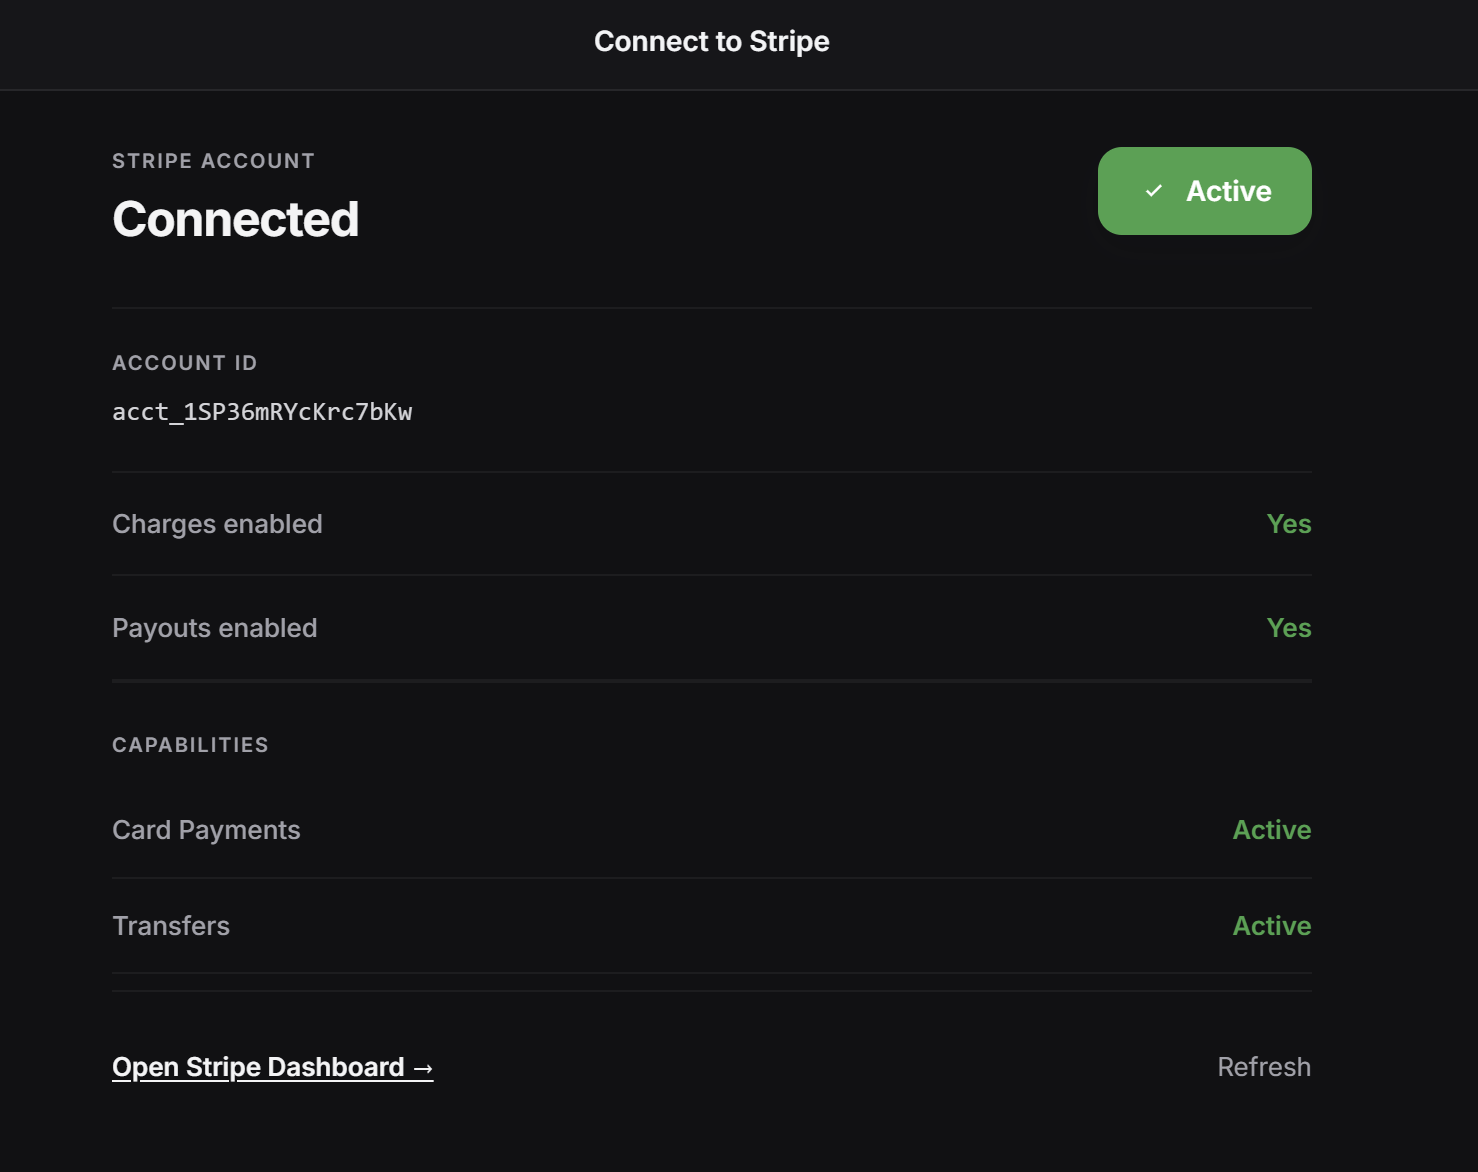 **Connected** means the Stripe account is linked to PeekTag.
**Charges enabled** means the account can take customer payments.
**Payouts enabled** means the account can receive payouts from Stripe.
**Card Payments active** means card checkout can be used when the experience supports it.
**Transfers active** means Stripe can route funds to the connected account when the payment flow requires it.
A Stripe account can be connected but still not fully ready for live payments. If charges or payouts are not enabled, the owner may need to finish Stripe requirements before customers can pay successfully.
## Open Stripe Dashboard
After connection, the owner can open the Stripe Dashboard from PeekTag.
Use the Stripe Dashboard to review payment activity, account requirements, payout settings, verification status, and other Stripe account details.
If the account status looks wrong, click **Refresh** in PeekTag after completing updates in Stripe.
## When to set it up
Connect Stripe before publishing any experience that accepts online payments.
This is especially important for experiences that use:
* Stripe checkout
* paid ordering
* paid booking
* deposits
* card-based customer payments
## Important notes
Stripe is responsible for payment verification, payout requirements, and account compliance. PeekTag shows the connection status, but the business owner may still need to complete missing steps inside Stripe.
The connected account should belong to the person or business that is supposed to receive the money.
Before going live, test the full payment flow from the customer side and confirm that the Stripe account shows charges and payouts as enabled.
**Connected** means the Stripe account is linked to PeekTag.
**Charges enabled** means the account can take customer payments.
**Payouts enabled** means the account can receive payouts from Stripe.
**Card Payments active** means card checkout can be used when the experience supports it.
**Transfers active** means Stripe can route funds to the connected account when the payment flow requires it.
A Stripe account can be connected but still not fully ready for live payments. If charges or payouts are not enabled, the owner may need to finish Stripe requirements before customers can pay successfully.
## Open Stripe Dashboard
After connection, the owner can open the Stripe Dashboard from PeekTag.
Use the Stripe Dashboard to review payment activity, account requirements, payout settings, verification status, and other Stripe account details.
If the account status looks wrong, click **Refresh** in PeekTag after completing updates in Stripe.
## When to set it up
Connect Stripe before publishing any experience that accepts online payments.
This is especially important for experiences that use:
* Stripe checkout
* paid ordering
* paid booking
* deposits
* card-based customer payments
## Important notes
Stripe is responsible for payment verification, payout requirements, and account compliance. PeekTag shows the connection status, but the business owner may still need to complete missing steps inside Stripe.
The connected account should belong to the person or business that is supposed to receive the money.
Before going live, test the full payment flow from the customer side and confirm that the Stripe account shows charges and payouts as enabled.